
Bread making
Bread making
-
-
-
-
-
-
Post #31 - February 2nd, 2009, 3:24 pmI have made several breads from the Reinhart book and here is what I have found. I knead the bread in my kitchenaid as he directs for 6 minutes. I set the timer. I have made his two day breads and refrigerated those parts that need to be refrigerated but for other breads in his book that don't require it I haven't.
Keep trying. It took me awhile to get his challah recipe to really work and now when I make it I Friday the comments that I get is the bread is awesome. For this bread I use AP flour and not bread flour.
For the hearth breads I use a large pizza stone in the middle of my oven. I put a cast iron pan to heat with the stone on the bottom shelf in which I put water after I place the bread on the stone and spray the inside of the oven with water. I have been satisfied with the result.
Also I have made bagels from his book and the comment from VI's youngest was that they were the best bagels she ever ate. This dough is more difficult to knead and it does stop my 6 qt 525 watt kitchenaid and it needs to cool down before proceeding. But the bagels are great.
Just keep trying you'll get the feel, because unlike cooking or cake and cooking baking a lot of bread making is feel.
Paulette
-
-
Post #32 - February 8th, 2009, 4:30 pmrickster wrote:I would try reducing the kneading and possibly increasing the hydration if you want bigger holes.
Reducing the kneading? Doesn't the kneading help increase the elasticity that creates the chewiness?
I'm not looking for holes so much as I am a different texture. I'm really seeking that chewiness that you find in good french bread. What I'm winding up with is a nice spongy bread.
My latest effort (today) used a wetter dough which gave me a very different crust (more "crisp" less "crunch") but a nearly identical crumb. I had high hopes during the kneading because I thought that I had much nicer elasticity going than in previous efforts.

Best,
Michael
-
-
-
Post #33 - February 9th, 2009, 8:27 ameatchicago,
I concur with what is written above. Your crumb looks great. If you want those really big holes, you need a wetter dough, don't develop the gluten as much (i.e. don't kneed it as much), and be careful not to release too much of the air in the dough (i.e. don't punch it down; or do it minimally). Sometimes I've made doughs that are so wet that I can't kneed them by hand; I can only do it in the mixer.
-
-
-
Post #34 - February 9th, 2009, 8:33 amDarren72 wrote:eatchicago,
I concur with what is written above. Your crumb looks great. If you want those really big holes, you need a wetter dough, don't develop the gluten as much (i.e. don't kneed it as much), and be careful not to release too much of the air in the dough (i.e. don't punch it down; or do it minimally). Sometimes I've made doughs that are so wet that I can't kneed them by hand; I can only do it in the mixer.
Thanks, Darren. Texture is a much bigger concern for me than holes. I'm looking for a greater chewiness rather than the tender sponginess that I'm getting.
-
-
-
Post #35 - February 9th, 2009, 8:35 amSorry that I didn't catch that.
Are you using bread flour?
-
-
-
Post #36 - February 9th, 2009, 8:37 amDarren72 wrote:Sorry that I didn't catch that.
Are you using bread flour?
Half.
Reinhart's formula is 50-50 bread flour and AP flour. I have certainly thought about going 100% on the bread flour.
-
-
Post #37 - February 9th, 2009, 9:02 amNot sure if I'm helping matters or making things worse but I've been doing weekly batches of sourdough with a starter I started a little over a month ago. I'm planning on taking some pictures and documenting things but I still want to practice a little more.
One thing I immediately noticed was the sourdough bread was chewy and toothsome on a level that my years of baking with store-bought yeast never was. The difference has been striking enough for me to wonder if it isn't part of the nature of sourdough bread itself. Perhaps this is obvious to others but I had kind of assumed that one levener = any levener (roughly, at least...).
That's about the only reason for the difference in texture that I can see. All of the other ingredients (flour - a blend of rye and hard wheat, salt and water) are the same as are my mixing/resting times.
Have you given sourdough a shot, Michael? I was baking with mine within a week of starting my starter (although it is getting stronger and more sour with age).
-
-
Post #38 - February 9th, 2009, 9:08 amBridgestone wrote:Have you given sourdough a shot, Michael? I was baking with mine within a week of starting my starter (although it is getting stronger and more sour with age).
Not yet, so far only store-bought rapid-rise yeast. But I certainly plan on introducing that element. Thank you. I'll keep you posted.
Best,
M
-
-
-
Post #39 - February 9th, 2009, 9:09 ameatchicago wrote:Half.
Reinhart's formula is 50-50 bread flour and AP flour. I have certainly thought about going 100% on the bread flour.
Try 100% bread flour. I usually make sourdough with 100% bread flour (King Arthur brand) and also add a little wheat germ. The wheat germ gives a nice flavor and makes it a little more dense. You could also replace a little of the bread flour with whole wheat. Even if you don't add whole wheat or wheat germ, I'd try going with 100% bread flour (especially if your AP flour is relatively low in protein).
Note: I'd have to double check the exact ratio of wheat germ to flour, but I add about 1/2 cup of wheat germ for a dough that make two boules. If you are making one, and want to add wheat germ, start with about a 1/4 cup. Don't worry about the weight - the exact measurement isn't that important.
-
-
-
Post #40 - February 9th, 2009, 11:24 amExcept for making Challah, I use 100% bread flour in Reinhardt's recipes calling for white flour. In his whole grain breads I use 50/50 with bread flour. Although I normally make challah with AP flour thinking that when it started to come out the way I wanted it to that that was the reason, however, last friday when I didn't have enough AP flour I used bread flour. The only difference I found was that the dough wasn't as sticky as usual but not really any difference in texture. The dry dough might have also come from using large eggs instead of extra large which is what I also had in the house.
Sometimes I just think its getting to know the dough and working with it. I follow Reinhardt's recipes pretty much as written and find they work as written.
By the way I think your bread looks great.
Paulette
-
-
-
Post #41 - February 9th, 2009, 11:50 amSince there are a few of you here working with Reinhardt's book, maybe someone has experience with his 100% whole wheat bread. I like this bread a lot, especially if you follow his advice to add some cornmeal, oats, or other coarse ground whole grain. I think this addition gives the bread a little more complexity. I also like to swap out some of the whole wheat flour for bread flour to lighten it a little bit.
But there's one problem I've always struggled with: does anyone find that there really isn't enough dough to fill two bread pans? I don't remember exactly what size he uses (8.5" by 4.5"?). When I use the bread pans he recommends, the dough barely makes it above the rim of the pan and is generally too short for sandwiches. Am I alone in this?
-
-
-
Post #42 - February 9th, 2009, 4:18 pmDarren,
I made the traditional whole wheat bread from his whole grain book last week. My son wanted a bread after I had made the soaker and the biga so the next day I completed the bread and divided it in half. I used a 8.5 x4 bread pans and yes the breads aren't tall but they were a fairly good size. This does cause a problem for me as a diabetic since I can only have one slice at a meal so I can't cut it in half to make a 2 piece sandwich. I am sure it would have been taller had I made one. I also think I let it rise for about 15 or 20 minutes longer than the recipe since I was baking mandelbread at the same time as the bread was rising. By the way it was good.
Paulette
-
-
Post #43 - February 15th, 2009, 5:01 pmeatchicago wrote:Darren72 wrote:Are you using bread flour?
Half.
Reinhart's formula is 50-50 bread flour and AP flour. I have certainly thought about going 100% on the bread flour.
So, I tried the same bread with 100% bread flour as opposed to the 50-50 formula.
When we ate the test, Cookie simply said "this is better".
I'm not sure there's a major visual difference in the crumb (albeit some larger holes), but the texture was clearly less spongy and chewier. Far from my ideal loaf, but a very good effort. (You might also spot some kernels of corn meal in the crumb. There was a mishap after proofing and I had to reshape. As a result, some cornmeal got pulled into the center.)
I think I'm off french bread for a while. I'll keep you posted on what's next.
Best,
Michael
-
-
-
Post #44 - February 15th, 2009, 7:10 pmMichael,
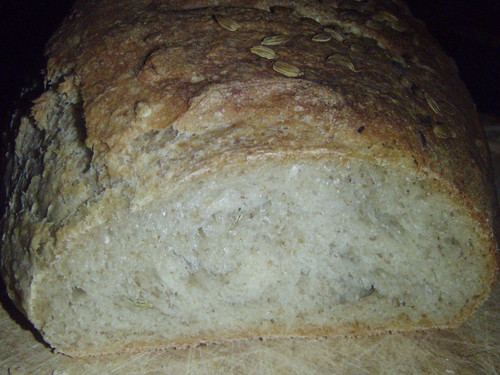
This past weekend my wife and I made two types of bread. The first was the Pain de Campagne from Reinhardt's book. This is similar to the basic French bread that you've been making, but it uses mostly bread flour and a bit of whole wheat flour. We also added some toasted and ground fennel, poppy, and sesame seeds. Like you experience, the dough was not super-chewy, but it was good. If it weren't for the spices and whole wheat, the bread wouldn't have been terribly interesting. Reinhardt says that this dough is easy to shape - we made epis.
We also made some sourdough that incorporates about a 1/2 cup of raw wheat germ for two boules. This is my favorite bread and the difference between it and the Pain de Campagne is clear. This bread is incredibly chewy and flavorful, esp the crust.
-
-
-
Post #45 - February 16th, 2009, 8:42 pmAfter being twitted by Michael's pictures, I realized we didn't have any dough going. I finally broke out of our rut and decided to try the five-minutes-a-day Deli-style Rye. I didn't have any caraway seeds, so I subbed fennel, which it turns out are quite beautiful in this bread. Here it is:
-
-
Post #46 - August 21st, 2009, 4:25 pmBasic bread making question...
I've recently gotten back into baking my own bread, so I'm learning a lot as I go along. I decided to try a potato bread recipe today as the Picky Eater is very fond of it. I used this recipe.
At step 8, my arm began to tire after getting about 2 cups of additional flour in and I moved everything into my standing mixer and used my dough hook. The dough seemed incredibly dry and shaggy after adding most of the remaining flour, so I added a bit more buttermilk, got it to a good consistency, then kneaded lightly until the dough felt right before setting aside to rise.
I have two questions - will adding the additional buttermilk (about 1/4 a cup) adversely affect the dough? Also, when changing from hand mixing to a standing mixer as I did, are there any considerations other than kneading time, to take into account?
One last question - a couple of my loaf pans are missing, so I'm using my backups, a pyrex loaf pan and a standard metal loaf pan. The bread cooked in the pyrex seems to rise better in the oven. Any thoughts or advice on standard loaf pans before I do any replacement shopping?
Thanks so much!"Baseball is like church. Many attend. Few understand." Leo Durocher
-
-
-
Post #47 - August 21st, 2009, 9:52 pmUrsiform wrote:Basic bread making question...
I've recently gotten back into baking my own bread, so I'm learning a lot as I go along. I decided to try a potato bread recipe today as the Picky Eater is very fond of it. I used this recipe.
At step 8, my arm began to tire after getting about 2 cups of additional flour in and I moved everything into my standing mixer and used my dough hook. The dough seemed incredibly dry and shaggy after adding most of the remaining flour, so I added a bit more buttermilk, got it to a good consistency, then kneaded lightly until the dough felt right before setting aside to rise.
I have two questions - will adding the additional buttermilk (about 1/4 a cup) adversely affect the dough? Also, when changing from hand mixing to a standing mixer as I did, are there any considerations other than kneading time, to take into account?
One last question - a couple of my loaf pans are missing, so I'm using my backups, a pyrex loaf pan and a standard metal loaf pan. The bread cooked in the pyrex seems to rise better in the oven. Any thoughts or advice on standard loaf pans before I do any replacement shopping?
Thanks so much!
Have you read the other posts here? Diannie (I think that's how it was spelled) gave some great tips to another poster. My first thought is whether you measured your ingredients or weighed them; it really makes a difference.
As far as adding extra ingredients and whether or not it adversely affects the dough, they say baking is science. (At least that's what they told me in school.) But, I have found bread dough to be very forgiving. Weather can be a factor, type of flour, etc. I'm always adding extra flour or extra liquid to get my dough to the desired state.
Regarding pans, I think that's a personal decision. I've never baked bread in a pyrex pan before. Some swear by clay, others by tin or aluminum. I've also baked bread free form which gives a crisper crust. All depends on what you like. Sorry that I'm so vague, but it's all pretty subjective.
Have fun,
Ms. IngieMs. Ingie
Life is too short, why skip dessert?
-
-
-
-
Post #48 - August 24th, 2009, 9:14 amMs. Ingie wrote:As far as adding extra ingredients and whether or not it adversely affects the dough, they say baking is science. (At least that's what they told me in school.) But, I have found bread dough to be very forgiving. Weather can be a factor, type of flour, etc. I'm always adding extra flour or extra liquid to get my dough to the desired state.
I'm glad you wrote this because it has been my experience too. You always hear that baking is a science - meaning that precise measurement of ingredients, and following particular combinations of ingredients, is much more important in baking than in "cooking" (a better term escapes me at the moment). I understand this sentiment, but I think it tends to scare people off from experimenting. I have found bread to be incredibly forgiving. Then, once you understand a few simple principles, it is really easy to improvise and adjust.
-
-
-
Post #49 - August 24th, 2009, 11:00 amThird vote for breadmaking not being as exacting as it's made out to be. OK, maybe the results aren't always great, but after a few trys, it's not that hard to get to the "pretty d-mn good" category.
I found the recipe in the link little hard to follow. Maybe it's just Monday but I didn't see directions for how much potato water was supposed to be left and when to mix in the potato water with the flour. I was trying to read carefully because the recipe sounded good!
It sounded like you made the dough, assessed the condition, and then added a little more buttermilk--which is perfectly correct. If you like the pyrex results, I'd get some more since they are cheap, convenient, and dishwasher-friendly. Le Creuset and Emile Henry make some really cute stoneware loaf bakers but they are a lot pricier."things like being careful with your coriander/ that's what makes the gravy grander" - Sondheim
-
-
Post #50 - August 24th, 2009, 12:34 pmMs. Ingie wrote:Have you read the other posts here? Diannie (I think that's how it was spelled) gave some great tips to another poster. My first thought is whether you measured your ingredients or weighed them; it really makes a difference.
As far as adding extra ingredients and whether or not it adversely affects the dough, they say baking is science. (At least that's what they told me in school.) But, I have found bread dough to be very forgiving. Weather can be a factor, type of flour, etc. I'm always adding extra flour or extra liquid to get my dough to the desired state.
Ms. Ingie
In fact, the dough quiteforgiving and the bread came out very, very well, thanks so much for the reassuring advice. I've been reading this, and other, threads on bread making, looking for tips and tricks. I'll definitely start weighing instead of measuring, it really seems like the way to go. Next up, I may pick up a Reinhart book and just get one of those starters from sourdo.com that everyone seems to love so much...grits wrote:I found the recipe in the link little hard to follow. Maybe it's just Monday but I didn't see directions for how much potato water was supposed to be left and when to mix in the potato water with the flour. I was trying to read carefully because the recipe sounded good!
It sounded like you made the dough, assessed the condition, and then added a little more buttermilk--which is perfectly correct. If you like the pyrex results, I'd get some more since they are cheap, convenient, and dishwasher-friendly. Le Creuset and Emile Henry make some really cute stoneware loaf bakers but they are a lot pricier.
The recipe calls for 1 cup of potato water to be held aside (you proof the yeast in it). It could have written a been a bit more clearly, I realized after the fact that I added too much flour (2 cups to begin and then I had another 6-7 cups, oops) as I hadn't read the recipe correctly. That being said, the dough "felt" right, so I think I'm starting to remember some things, phew!
It was a great bread, we used it in sandwiches and french toast for our out of town company this weekend and it was really enjoyed by everyone. By far, my favorite of the breads I've been experimenting with lately from Bittman, Cooks Illustrated, notes from a baking class I took at age 7 in 1978, my mothers copy of the Joy of Cooking, the internet and Baking In America. Good thing the Picky Eater loves sandwiches so much!
I did one loaf in pyrex and the other in aluminum, and again, the pyrex loaf pan had a greater rise in the oven. As they are so inexpensive (I see them for under a dollar in thrift stores all the time) I think I'll pick up a few more of the pyrex and just continue with those for the time being. Thanks again for all the good advice!"Baseball is like church. Many attend. Few understand." Leo Durocher
-
-
Post #51 - October 9th, 2009, 1:58 amBridgestone wrote:Not sure if I'm helping matters or making things worse but I've been doing weekly batches of sourdough with a starter I started a little over a month ago. I'm planning on taking some pictures and documenting things but I still want to practice a little more.
One thing I immediately noticed was the sourdough bread was chewy and toothsome on a level that my years of baking with store-bought yeast never was. The difference has been striking enough for me to wonder if it isn't part of the nature of sourdough bread itself. Perhaps this is obvious to others but I had kind of assumed that one levener = any levener (roughly, at least...).
That's about the only reason for the difference in texture that I can see. All of the other ingredients (flour - a blend of rye and hard wheat, salt and water) are the same as are my mixing/resting times.
Have you given sourdough a shot, Michael? I was baking with mine within a week of starting my starter (although it is getting stronger and more sour with age).
If jumping from yeast-risen to sourdough-risen bread was an improvement in my bread baking, changing from home-captured sourdough cultures to Sourdough International's cultures has been a revolution.
I haven’t been using these cultures too long but I’m already pleased enough with the results to post a few (billion) pictures.
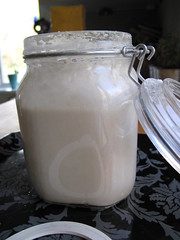
This is the culture when I take it out of the refrigerator the morning or night before baking.
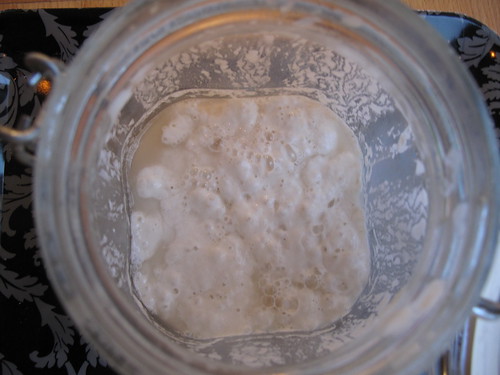
I bake weekly so it’s only been “asleep” for about one week. It still needs to be fed and activated, though.
The process is simple and goes quickly with these powerful cultures. Add flour and water, mix and wait. I repeated the process once after about 4 hours (total of 2 feeds to get fully active).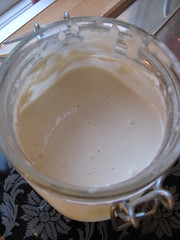
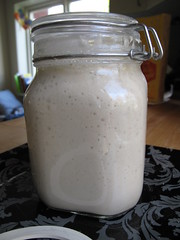

A few hours after the second feeding, I knew the culture was fully active: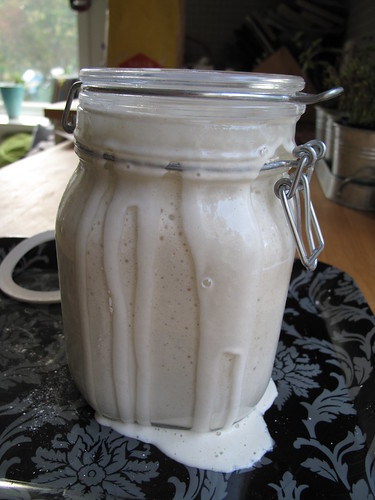
(I know from experience that this would have continued and covered the entire tray it was on if I hadn’t have kept my eye on it…)
With an active culture, it was time to make the dough. I used (and I know it’s annoying to weigh – in grams, no less – but I’ve learned that consistent results with sourdough requires precision) 900 grams wheat flour, 120 grams rye flour, 600 grams water and 320 grams of the active culture. I use organic (even biodynamic) flours but I’m not convinced this is necessary. After weighing, I dump everything into the bowl of my mixer and mix for roughly one minute.
Before: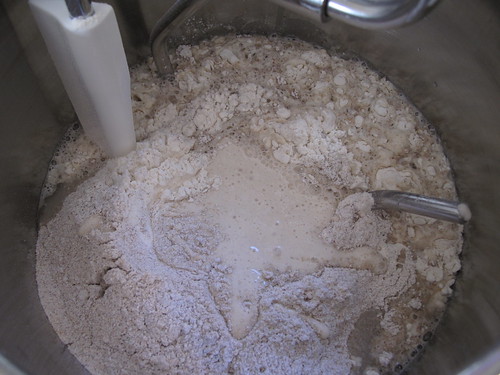
After: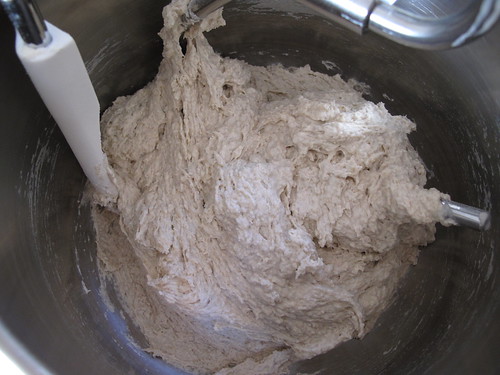
The just-incorporated dough gets to rest for 30 minutes.
Now is also when I put the rubber gasket back on the culture’s jar and put it back in the refridgerator.
After the half-hour rest, I add about 20 grams of salt and mix on low speed for only about 5 minutes. Despite the short mixing times, you can see that the gluten has already begun to develop: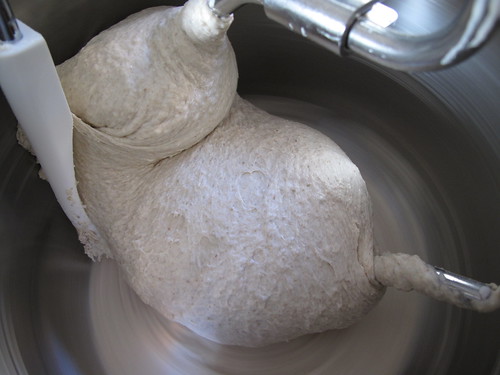
After kneading, I dump the dough into a large plastic container that I’ve oiled with a few tablespoons of canola oil.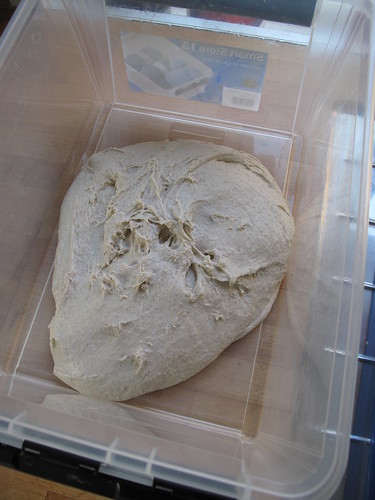
The dough now needs to ferment for roughly 2 ½ hours. However, during fermentation, it needs to be folded. After an initial 45 minutes of fermentation, the dough still looks, well, limp and flat.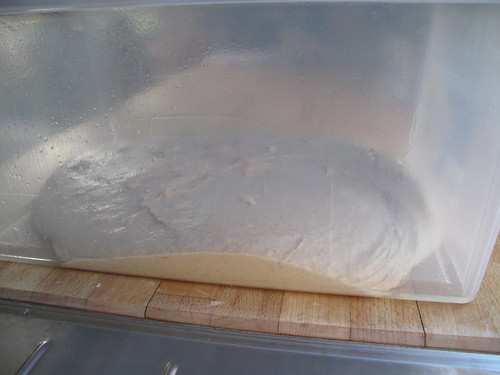
Folding isn’t exactly rocket science but here’s how I do it: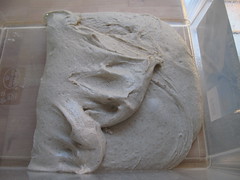

That’s: fold from left, right, down, up. I then flip the dough over.
Do this two, even three times during the 2 ½ hour rise/rest.
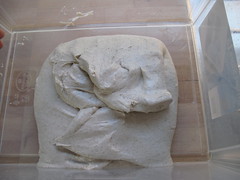
After the final folding, it’s pretty obvious that the dough has a tighter texture: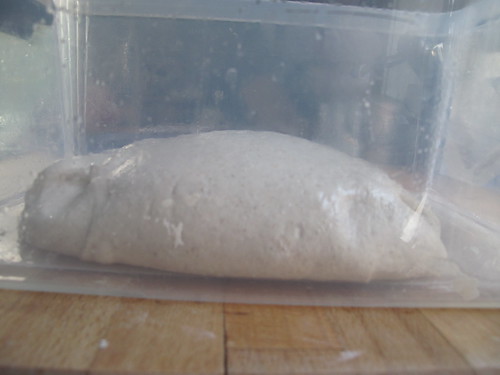
Dump the dough out onto a floured work surface…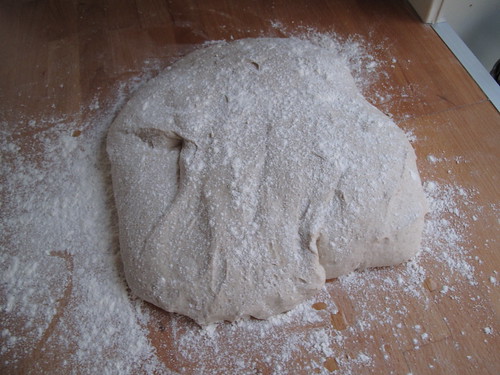
… and divide: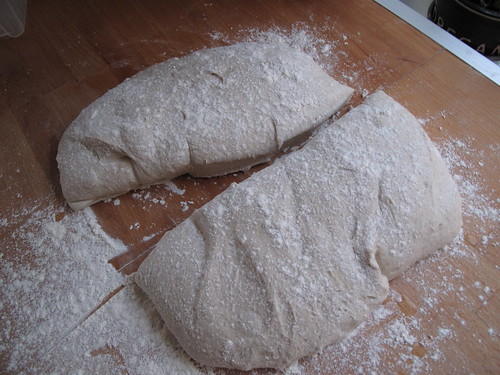
I generally make two large loaves although I’ve also used this amount to make one loaf and 8 buns.
I’m still not up-to-speed in my bread-baking supplies department so forgive the quick fixes here…
The loaves need to rest and rise again before baking. I use some sort of perforated container (one colander and one woven bread basket) lined with a floured kitchen towel.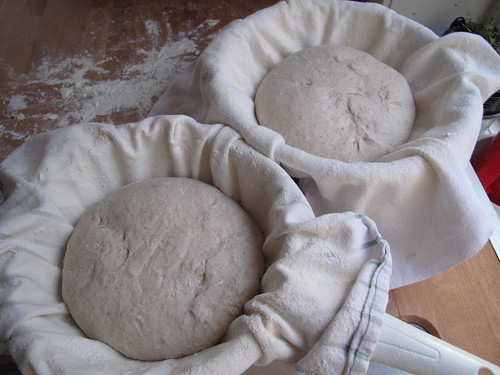
The loaves should rest/rise for about 2 ½ hours at room temperature or overnight in the refrigerator. This batch rested overnight.
The next day, I started baking by preparing my “peel” (a thick paper folder) with a sprinkle of cornmeal and flour.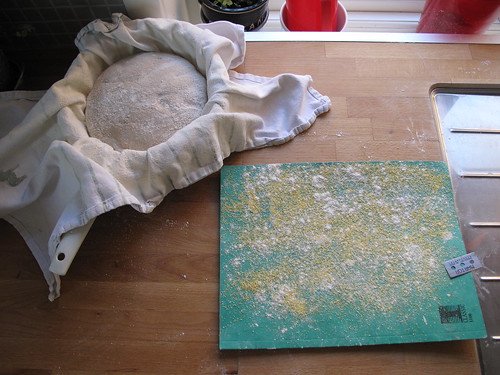
Quickly and gently turn the loaf out onto the “peel”…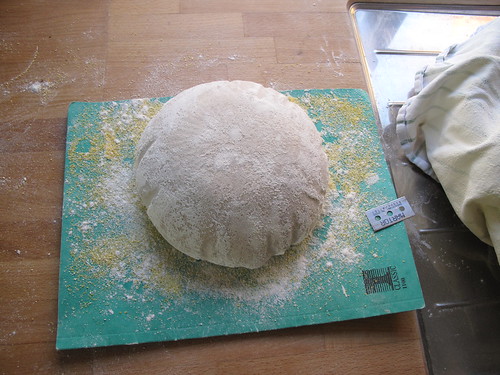
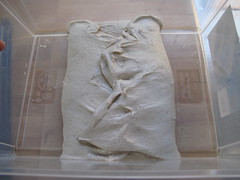
… and score with a razor: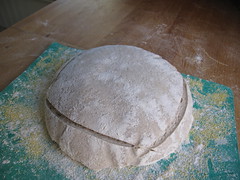
Scoring gives you a glimpse of what the bread’s structure will be: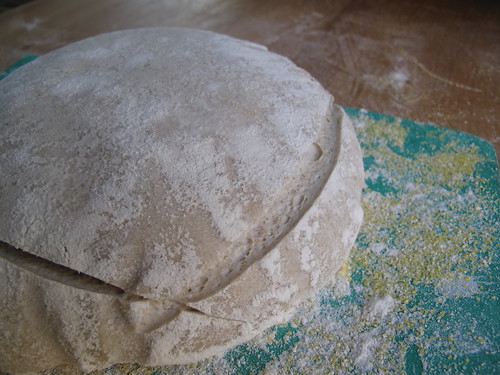
Quickly after scoring, slide the loaf onto a pre-heated baking stone in a hot (250 degrees C) oven.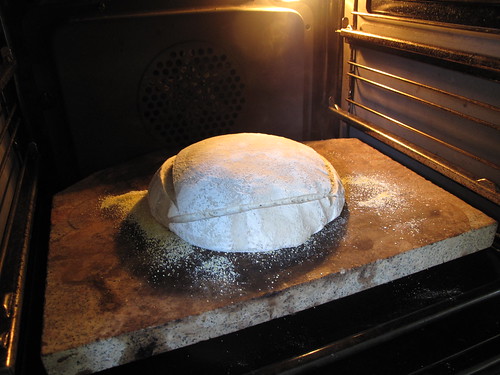
Right as I close the oven door, I slide a few ice cubes onto the baking sheet that the stone is positioned on.
Bake until the bread reaches 98 degrees C: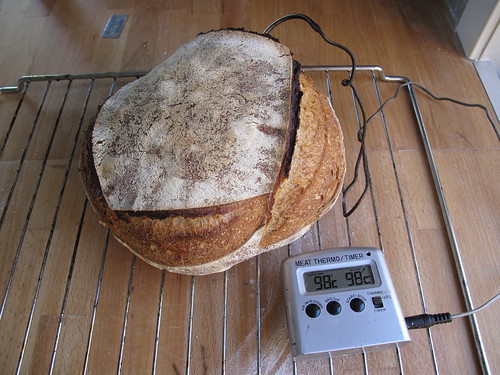
(Yes, I use a thermometer when baking. As pathetically obsessive as this may seem, I’ve simply misjudged too many loaves – especially loaves that are cool from overnight proofing in the refrigerator.)
The finished loaves: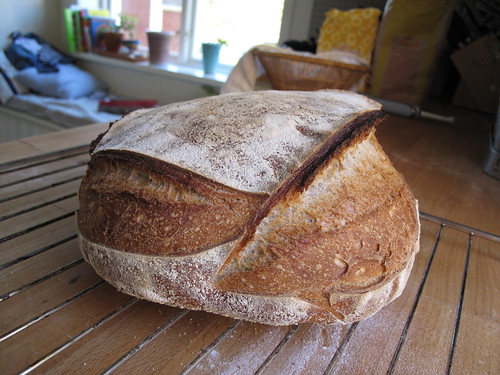
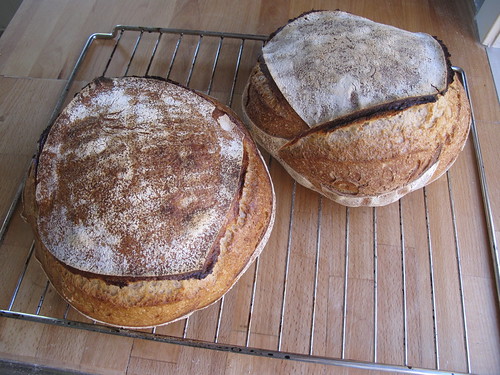
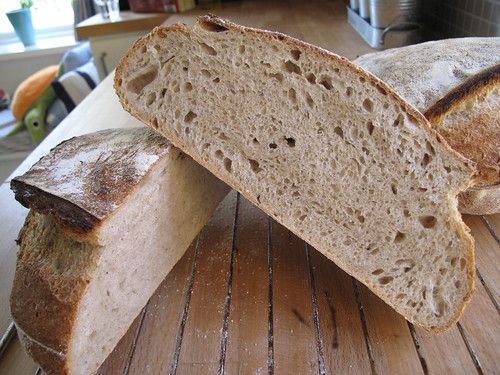
Loaves with this structure and that rise this well yet contain no commercial yeast were not even imaginable with my home-grown cultures. Flavor-wise, this particular culture is quite mild and buttery. However, I’m noticing that it is changing with age and the sourdough flavor is getting more pronounced.
-
-
-
Post #52 - October 9th, 2009, 5:49 amBridgestone wrote:However, I’m noticing that it is changing with age and the sourdough flavor is getting more pronounced.
Beautiful bread!!!!
Once the new culture stabilizes, you will probably note that the flavor contributed by the starter has more to do with how frequently it is fed. Feed (and use!) it often for best flavor.
-
-
-
Post #53 - October 9th, 2009, 7:52 amThanks for the advice, Bill!
I'll certainly be using this culture as often as possible.
-
-
-
Post #54 - October 9th, 2009, 8:00 amAmazing pictures - thanks for posting them.
-
-
-
Post #55 - October 9th, 2009, 8:22 amWhich yeast(s) from Sourdough International do you use?
I use the French one, and I love the results, but on a very different timescale. I make the dough, then refrigerate at least a day, preferably two and up to 7. The best loaves seem to come somewhere in the 3-4 day range. (This is less inconvenient than it sounds since I have two to bake a couple of days apart, so it's no trick to have fresh bread every 3 days or so with a little planning.)
Maybe it would rise sufficiently with no refrigeration, but I question whether mine would really react like yours do that quickly.Watch Sky Full of Bacon, the Chicago food HD podcast!
New episode: Soil, Corn, Cows and Cheese
Watch the Reader's James Beard Award-winning Key Ingredient here.
-
-
Post #56 - October 9th, 2009, 8:30 amThis is the Ischian culture - one of the two that comes in the "Italian Cultures" package.
I was shocked with how quickly one can make an attractive loaf of sourdough with this culture, too. However, I'm certain that the flavors will only improve by stretching out the proofing time.
Your staggered baking plan for the two loaves makes perfect sense! I'll be doing this as soon as my wife agrees to devoting another shelf in the refrigerator to my cooking hobby...
-
-
-
Post #57 - October 9th, 2009, 8:45 amBoth the French and Ischia starter love a room temp fermentation (70-75F). I bulk ferment for about 19 hours. If using right away, I then shape & proof for about 5 hours. Otherwise, I put in fridge and use as needed. After about 6 days of refrigeration, quality begins to deteriorate quickly.
-
-
-
Post #58 - October 9th, 2009, 8:55 amBill/SFNM wrote:I bulk ferment for about 19 hours.
O.K., help me out a bit, please. (And I'm thrilled to be able to ask these questions to the board's resident experts!)
Is "bulk ferment" the stage that I did in the post above in the plastic container (where I folded every 45 minutes)? If so, I'd be so afraid of over-proofing the dough that I don't think I'd ever have lasted 19 hours! I've had a few early experiences with over-proofing and since then, I've been reluctant to do too many long, room temperature ferments.
But, just so I have understood this correctly, Bill - You bulk ferment for 19 hours at room temperature?
-
-
-
Post #59 - October 9th, 2009, 9:27 amBridgestone wrote:Bill/SFNM wrote:I bulk ferment for about 19 hours.
O.K., help me out a bit, please. (And I'm thrilled to be able to ask these questions to the board's resident experts!)
Is "bulk ferment" the stage that I did in the post above in the plastic container (where I folded every 45 minutes)? If so, I'd be so afraid of over-proofing the dough that I don't think I'd ever have lasted 19 hours! I've had a few early experiences with over-proofing and since then, I've been reluctant to do too many long, room temperature ferments.
But, just so I have understood this correctly, Bill - You bulk ferment for 19 hours at room temperature?
Yes, but I don't use rye flour in most of my breads. These cultures especially thrive on rye flour, so you will need to be careful about over-proofing, perhaps using less starter to support a longer fermentation.
-
-
-
Post #60 - October 29th, 2009, 5:36 amLTH,
First foray into bread making on the Big Green Egg. The BGE did its part, but I stupidly let the third proof, with the dough shapped, over rise on the counter. Not only did I let them over rise, but they were not even in a transfer basket or on a peel so when I moved the loaves they deflated.
I kneaded a bit, shaped again and let rise, but it was as if the yeast was played out as I got little oven/Egg spring and the loaves were somewhat dense. I used to bake quite a bit of bread and know better, lesson learned, got to get back in the groove.
Over risen loaves on the counter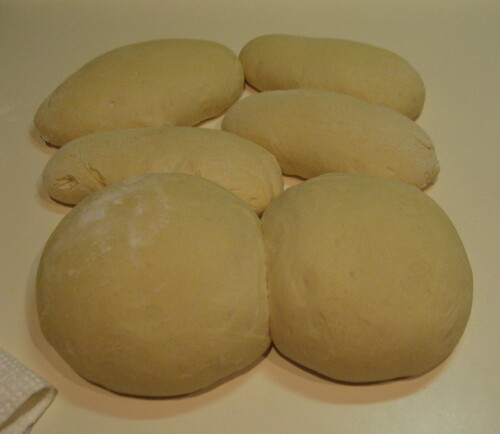
Bread on the Big Green Egg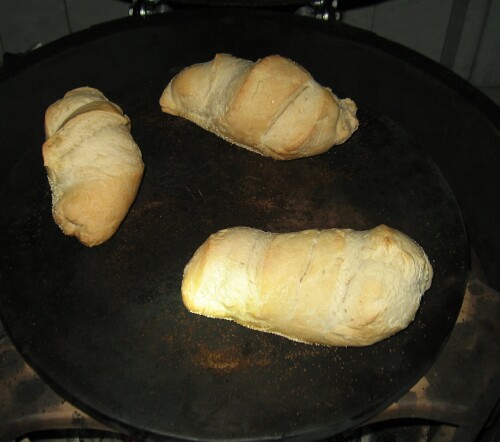
Cooling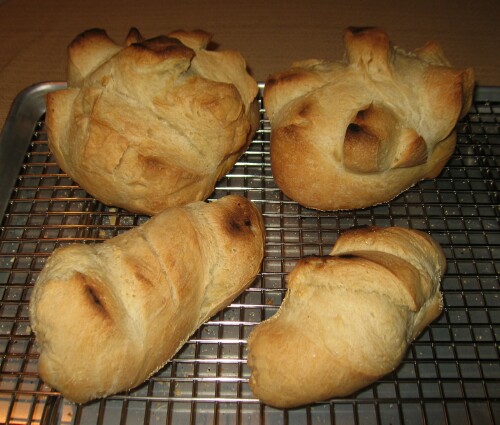
How do you get to Carnegie Hall? Practice, practice, practice.
Flour is cheap and I have a lot of charcoal.
Enjoy,
Gary


